The fastest way to make Agent ID “click” is to build it end-to-end once. This walkthrough is not meant to be a copy-paste script, it’s a guided tour that creates the core object we discussed, so the token flows later are easier to reason about.
What you’ll get by the end of the practice checkpoints:
- A real Agent ID object set in your tenant
- A concrete mapping between the theory chapters and the Graph objects you can enumerate
- A clean baseline you can reuse to test permissions, inheritance, and logging
We’ll use Microsoft Graph Explorer for administrator calls, and PowerShell 7 for the agent identity blueprint session where relevant. The admin account in this demo has Global Administrator for simplicity.
NOTE: Agent ID is currently in public preview, and many operations below rely on Microsoft Graph beta endpoints, which may change over time.
Let’s get started.
Creating an agent identity blueprint and its blueprint principal
To create an agent identity blueprint, you must provide at least:
- displayName
- sponsors (at least one)
Send a POST request to the /applications/graph.agentIdentityBlueprint endpoint. (Quick update: This can also be done via the Entra admin center now). The calling principal needs AgentIdentityBlueprint.Create permissions.
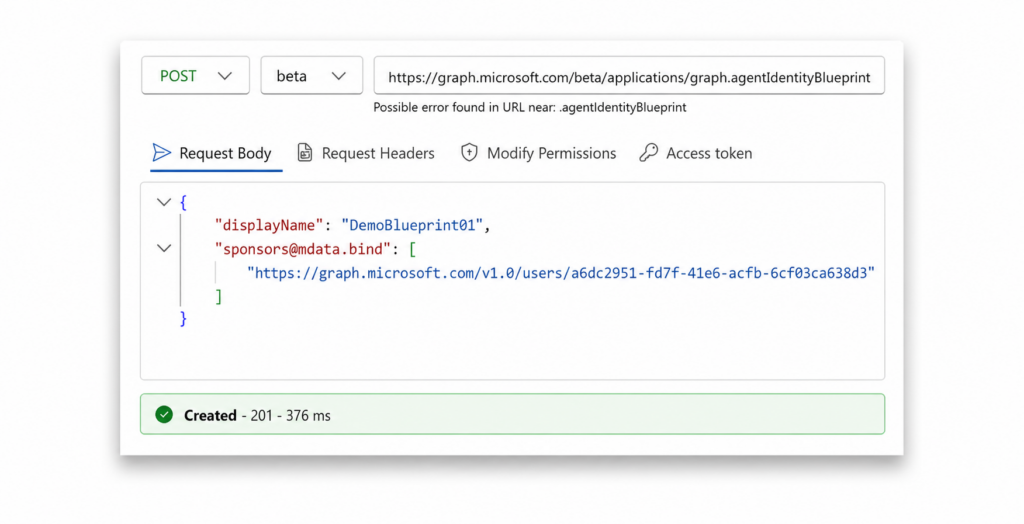
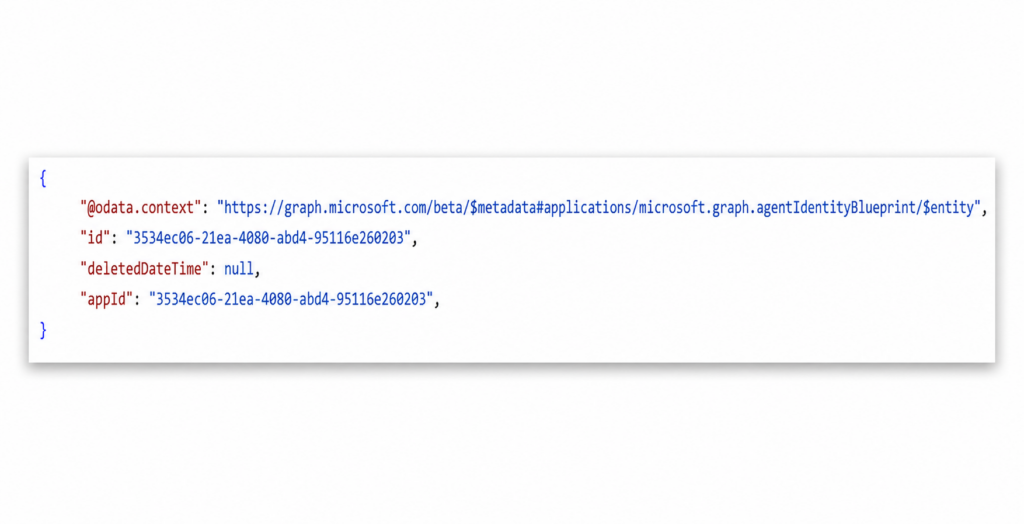
Record the blueprint object ID from the response. (We’ll reference it as <blueprint-id>.)
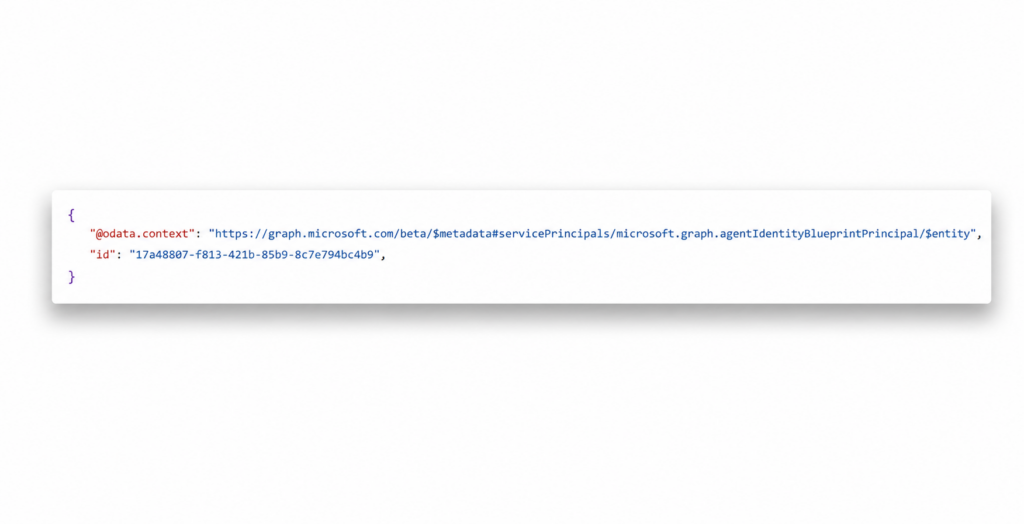
Next, create the blueprint principal (the tenant’s service principal instance of the blueprint). Send a POST request to /servicePrincipals/graph.agentIdentityBlueprintPrincipal and include the blueprint object id as a required parameter. The least-privileged permission for this operation is AgentIdentityBlueprintPrincipal.Create.

Record the blueprint principal (service principal) object ID from the response. (We’ll reference it as <blueprint-sp-id>.)
Adding credentials
In the next step, you’ll add credentials to the blueprint. We will show how to add a certificate and FIC; but in the demo, we will use a client secret credential type, although it is not recommended (more on this in the misconfiguration chapter of this guide).
To add a FIC, call /applications//federatedIdentityCredentials with the following parameters.

For a client secret, call /applications//addPassword with a passwordCredential object (display name + expiry). This requires AgentIdentityBlueprint.AddRemoveCreds.All.
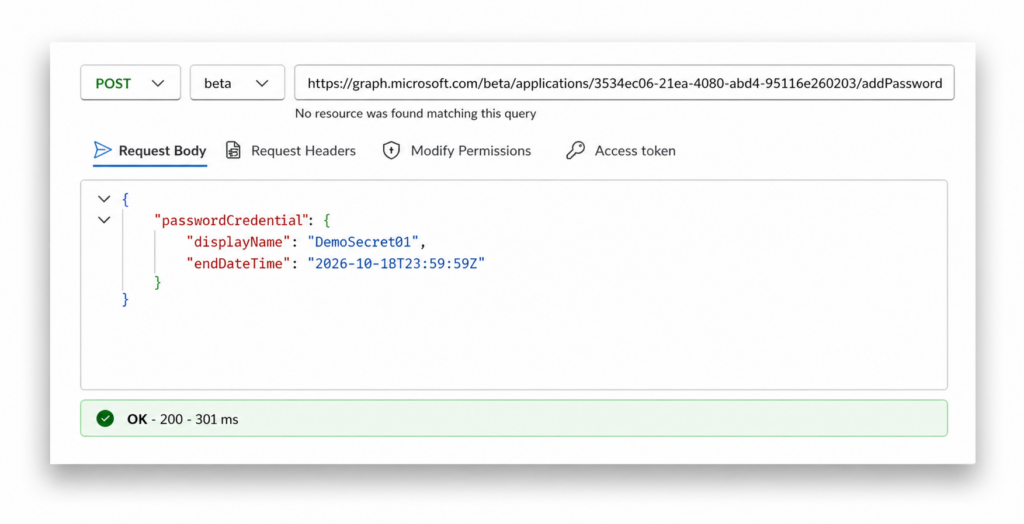
Record the secretText from the response. This is the value you’ll use for later authentication.
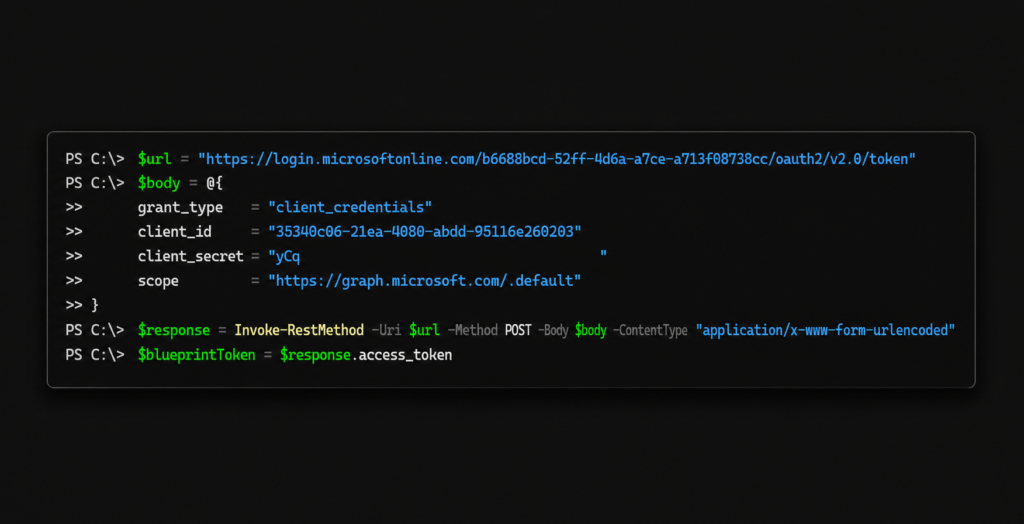
Blueprint authentication
Switch to PowerShell 7 and obtain an access token using the and the client secret you just created.
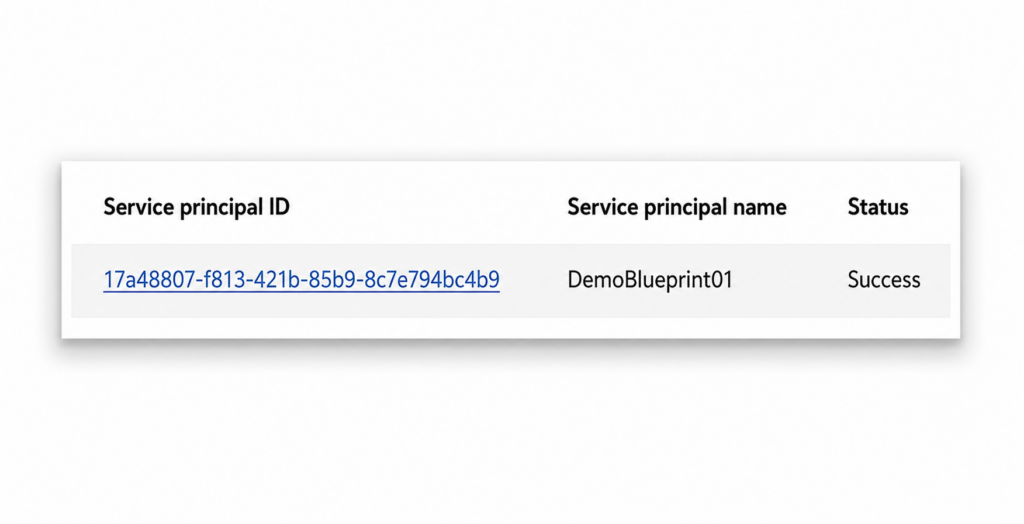
Now, when you look at the sign-in logs, you will see the blueprint service principal ID.
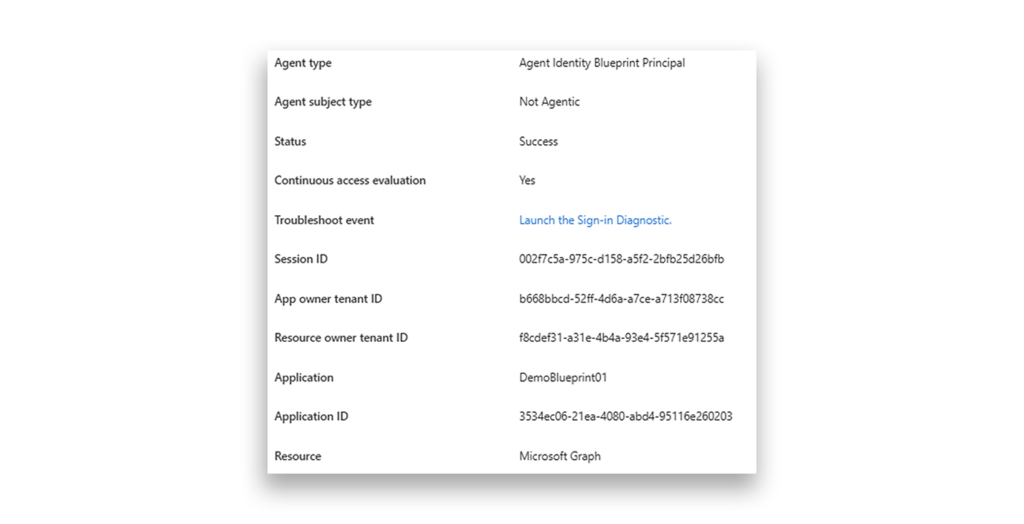
You can also see the agent identity blueprint ID in the logs.
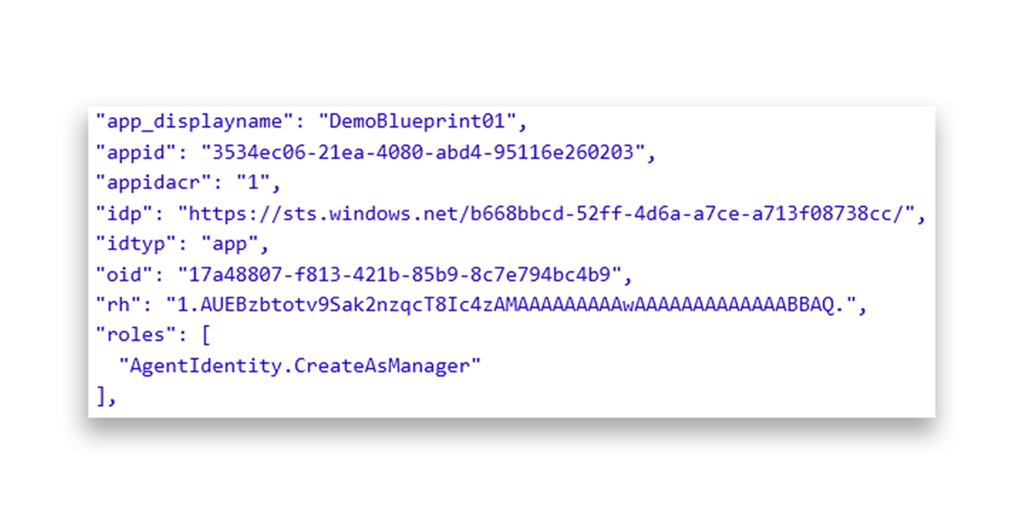
Now that you have an access token for the blueprint, you can decode it and see the default AgentIdentity.CreateAsManager permission we discussed earlier.
Creating the agent identity
With the blueprint authenticated, you can now use it to create an agent identity.
To do so, call the /servicePrincipals/Microsoft.Graph.AgentIdentity endpoint and provide the following properties: display name, sponsors list, and the agent identity blueprint ID.
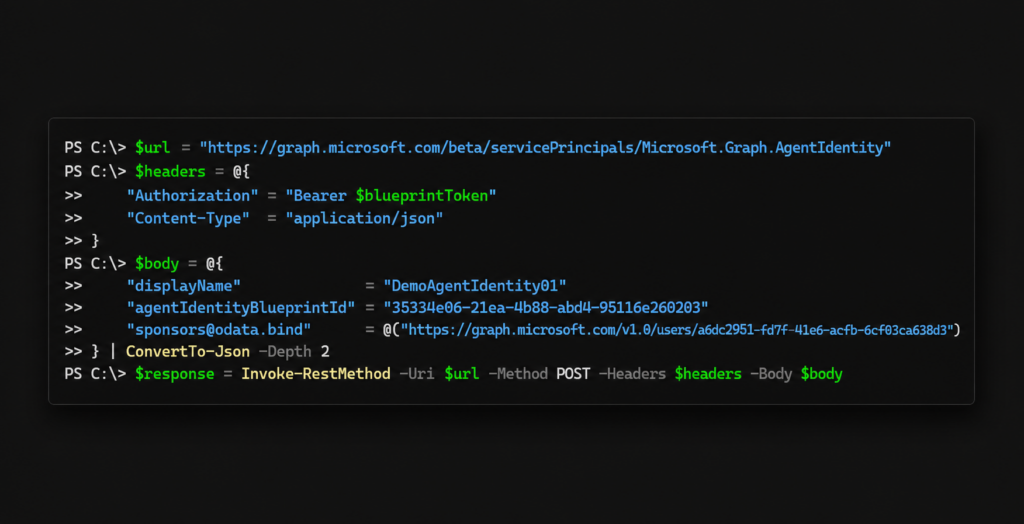
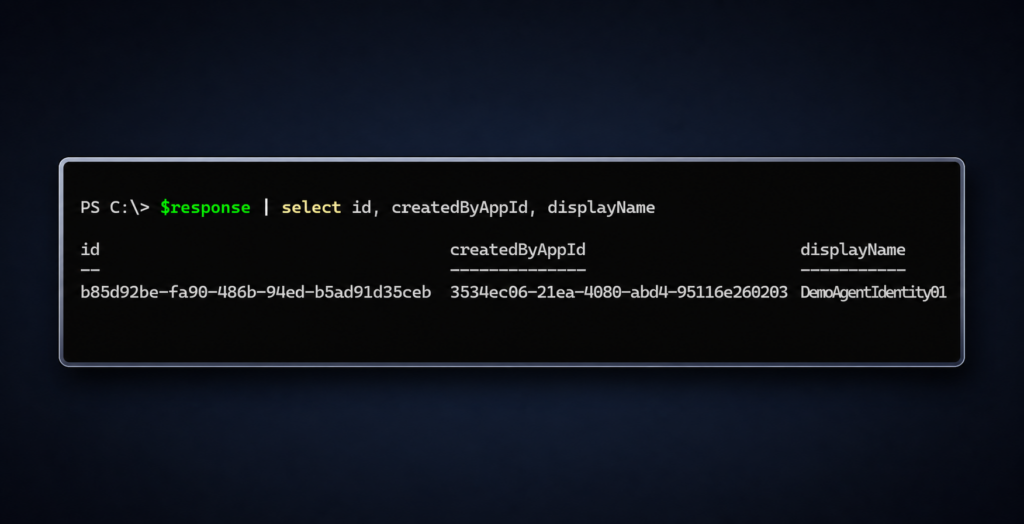
Record the agent identity object id from the response. (We’ll reference it as <agent-identity-id>.)
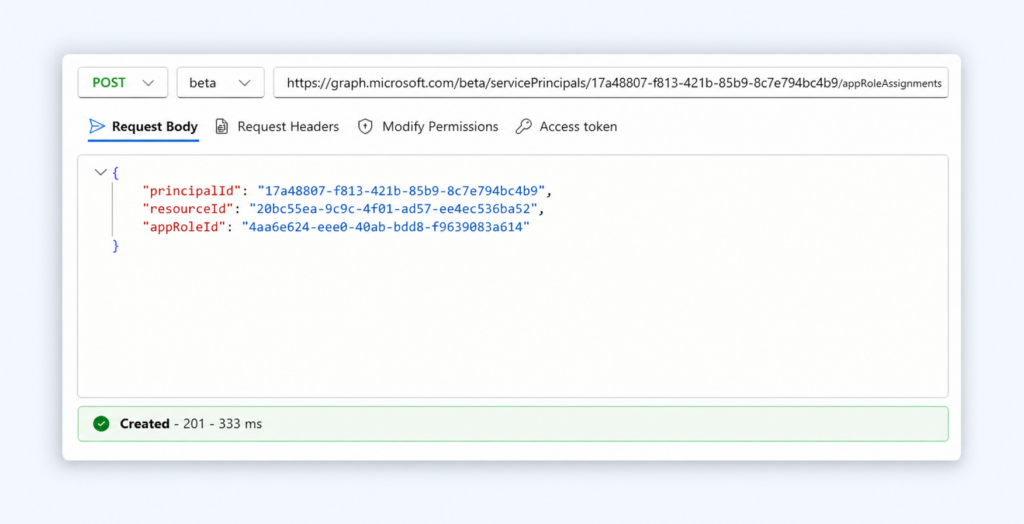
Creating an agent user
Before creating an agent user, we mentioned earlier that the agent identity blueprint must be granted additional permissions for this operation. We can assign these permissions by calling the /servicePrincipals//appRoleAssignments endpoint and granting the blueprint the AgentIdUser.ReadWrite.IdentityParentedBy application permission. We’ll use a tenant administrator account to perform this action.
In the request body, we need to include the blueprint SP ID, the resource ID (MS Graph SP ID), and the app role ID, which can be found here.
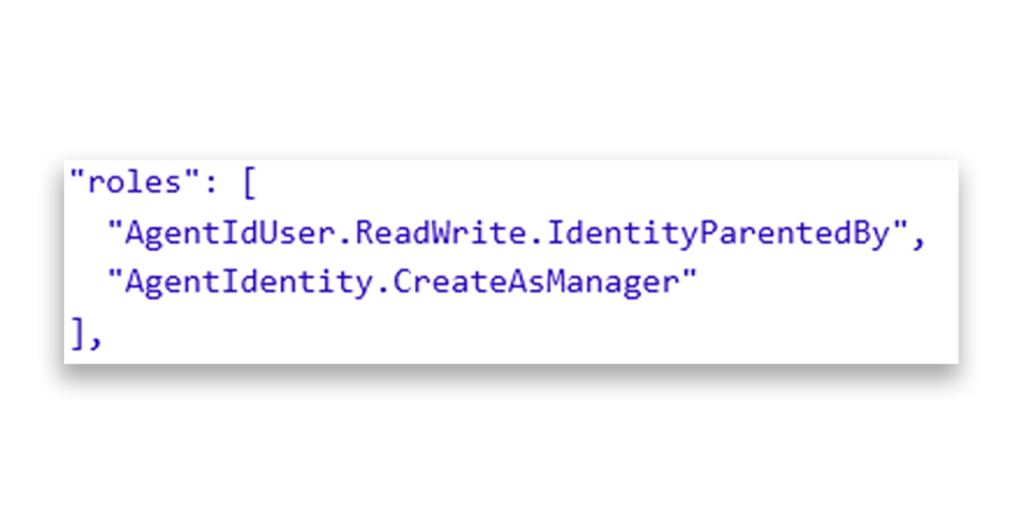
Now we can create an agent user. After obtaining a new token for the blueprint using the same method you already used, you can see the newly assigned role reflected in the blueprint token.
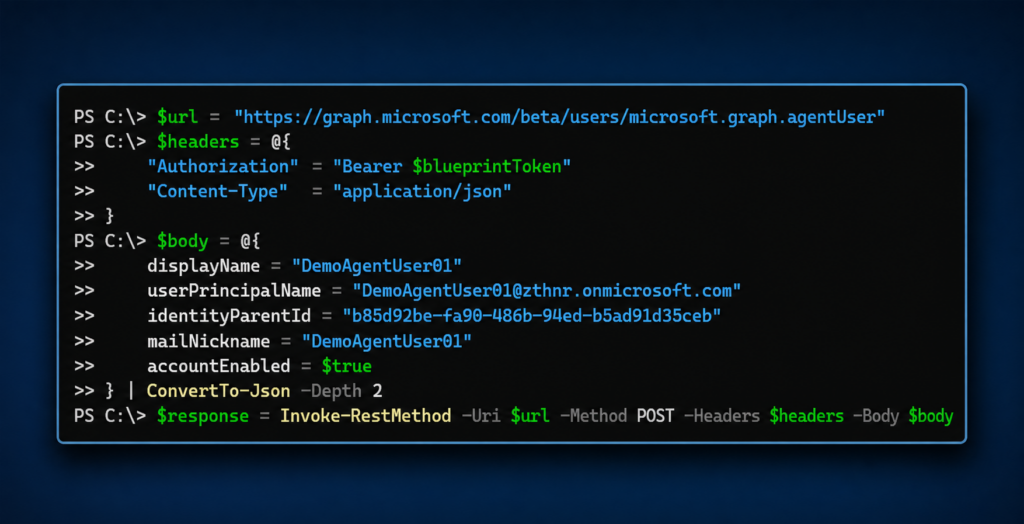
Now we can use this token to create an agent user by calling the /users/microsoft.graph.agentUser endpoint and providing a display name, user principal name, mail nickname, the agent identity ID as the agent user’s parent, and finally a flag indicating whether the account is enabled or disabled.
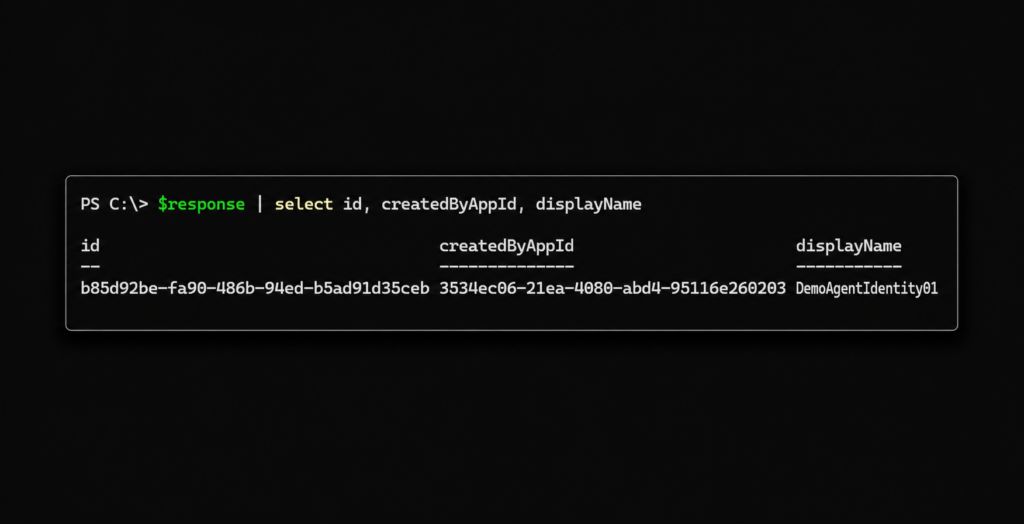
Record the agent user object id from the response. (We’ll reference it as <agent-user-id>.)
Reminder: Each agent identity can have only one agent user as a child (1:1 relationship).
Congratulations! You have built an agent identity.
In the next chapter of our guide, we dive deeper into the design the agent identity’s attributes.
Explore the guide
- Introduction: Understanding and Preventing Entra ID Agent Identity Attacks: A Comprehensive Guide
- Meet Entra ID Agent Identities (BTW They’re Not People)
- The Taxonomy of Workload Identities in Entra ID: Enterprise Applications, Service Principals, and Other Forms of Organized Confusion
- Understanding Microsoft Agent ID and the Agent Identity Platform